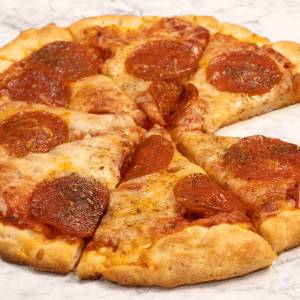
Gluten-Free, Dairy-Free Pizza Crust Recipe
Terrific texture and flavor! Crispy on the outside, chewy on the inside with a bready, yeasty flavor!
The Ingredients
Dry: Flour and Starch
- 308 g rice flour, White
- 172 g Tapioca flour
Dry: Supplemental
- 40 g soy milk powder
- 12 g xanthan gum
- 10 g gelatin, unflavored
- 2 g baking powder
- 31 g sugar, granulated
- 10 g kosher salt
Wet Ingredients
- 45 g sunflower oil, Healthy Harvest Brand
- 136 g egg whites , (100%, no fillers) Kirkland brand from Costco
- 7 g distilled white vinegar
Yeast and Water
- 8 g dry active yeast, NOT instant
- 1.75 - 2 cups carbonated water, you may need more water than 1.75 cups depending on the area you live
The Process
Mise en Place
- Prepare for baking by setting out your tools: bowls for measuring, mixer, parchment paper, sheet pans, carbonated water (or soda stream), 10" round to make circles, whisk, measuring cup, mixer with paddle attachment, non-stick spray, scooper, and spatula.
Prepare and Preheat the Oven
- Rearrange the two racks in the oven: Place one rack at the very top slot. Skip a slot and then place the second rack in the next slot. Set your oven to 400 degrees.
The Dry Ingredients
- Measure the rice flour and tapioca into the stand mixer bowl. Measure and add the supplemental ingredients to the same bowl as the flours.
Measuring the Wet Ingredients
- Measure each of the wet ingredients and then put in a small bowl. All the wet ingredients need to be in one bowl.
Measure the Yeast
- Using a small bowl and a kitchen scale set to grams, measure out 8g of dry active yeast. Make sure the Tare (clear) after you set the bowl on top of the scale.
Prepare the Water
- If you are using a Soda Stream for your water:As the warm water is flowing from the facet, put a probe thermometer in the stream and when it reaches a steady 110 degrees, fill your Soda Stream bottle and then carbonate the water using the Soda Stream.Add 1.75 cups of the carbonated water to a 4 cup measuring cup.
- If you are using Club Soda for your water:Add 1.75 cups of Club Soda to a 4 cup measuring cup, preferably glass.Microwave for 3 minutes, then temp the water using a probe thermometer. Heat longer if needed to bring the Club Soda to 110 degrees.
Activate the Yeast
- When you have your 110-degree water ready, begin whisking the water as you add the yeast slowly to the water. Keep whisking until nearly all the yeast has dissolved. You should see foam when you do this. If you do not, your yeast may be out of date or bad.
Time to Mix and Proof (Rise)
- Attach the mixing bowl to the stand mixer, attach the mixer's paddle attachment and raise the bowl into the mixing position. Set to speed 1 for 15 seconds to combine the dry ingredients. Add the wet ingredients while the mixer is still set at speed 1. Now, add the yeast and water slowly. Once it is all added, increase the speed to 2 until all the water is incorporated into the dry ingredients. Increase the speed to 4 and mix for three minutes. If the dough appears dry, lower the speed of the mixer and add a bit of water.
- When the mixing is complete, the dough should be soft and silky, similar to frosting. Lower the bowl and remove the paddle attachment. With a wet spatula, scrape the dough from the sides of the bowl. Cover the bowl with plastic wrap and set it on the top of your stove for 20 minutes (oven is on and set to 400 degrees).
Make the Circles While the Dough is Rising
- Cut four pieces of parchment paper sized to fit the 18x13 sheets pans you will be using. Using the curly side up, trace the 10" bowl, dish, or similar with a sharpie, remembering to add a checkmark so you can tell if the sheet has been flipped. Place the parchment paper with the side you traced the circle face down on the sheet pan.
- Spray the parchment paper around the circle and in the middle. You do not need a ton of spray but make sure it is well coated. Repeat the steps above for each sheet of parchment paper and set trays aside.
Scooping the First Two Crusts
- Move the bowl of dough to your work area and turn on your scale, set to grams. Put a small bowl on top of the scale and tare to zero. Spray the bowl you will be scooping into, the spatula, and the scooper with non-stick spray. Have a bowl of hot water nearby to dip your hands into.
- Start scooping the dough into the bowl on top of your scale until you reach 260g. If you need to take the dough out of the bowl on the scale, wet your hands before touching the dough. Once you have 260g in your bowl, wet your hands and slid it from the bowl to one of the sheets of prepared parchment paper. Scoop and measure out the second dough ball and add to another sheet of prepared parchment paper.
Forming the First Two Crusts
- Bring one sheet of parchment and dough to your work area. Make sure your bowl of water is nearby.
- With wet hands, pick up the dough ball and manipulate in your hands to make the dough ball more compacted.
- Using both hands, "throw" the dough ball down in the middle of the circle on the parchment paper.
- Slowly, using one hand with a light touch, spread the dough to extend about a half-inch beyond the circle. You can use two hands if you like.
- Once the dough is spread, run your hand over the top surface to smooth out any unevenness.
- Using the side of your hand pressed against the parchment, push the dough inside the circle about one-half inch. Rotate your parchment paper as you go.
- Using your left hand on the inside of the dough's edge and your right hand following the circle mark, lightly push the dough out to the edge of the circle.
- Make a final pass with your hand over the center to make sure you are level.
- Grab the parchment paper and crust using the two opposite corners of the paper and place on the sheet pan.
- Set sheet pan on top of stove/oven.
- Form the second crust like above.
- Once both crusts/pans are on top of the stove/oven, set a timer for 5 minutes.
Forming the Last Two Crusts
- Using the same process as the first two crusts, form the next two. By the time you are done, the first two crusts should be ready for the oven.
Parbaking the First Two Crusts
- After your five minute timer for the first two crusts goes off, place one sheet pan on each rack in the oven. Set the timer for 7 minutes.
- When the 7-minute time goes off, rotate the two pans in the oven and set the time to 7 minutes.
- After the second 7-minute timer goes off, removed the crusts from the oven, and slid the parchment and crusts onto a cooling rack, leaving the sheet pan behind.
Parbaking the Last Two Crusts
- Once the first two crusts are out of the oven, place the second two crusts in the oven and set the timer for 7 minutes. After the timer goes off, rotate the crusts and set a time for 7 more minutes. When that timer goes off, remove the crusts from the oven and set them on a cooking rack.
Now What?
- If you are planning to make a pizza right after parbaking the crusts, let them cool for about 10-15 minutes, top the pizza, and then bake on a pizza stone or sheet pan for 12-15 minutes, or until they achieve the desired crispiness.
- If you are planning to freeze any of the crusts for later use, make sure they are cooled completely. Once cooled, they can be stacked and placed in a freezer bag. Make sure you lay them flat in the freezer.
Notes
Although any certified gluten-free flours and starches will work wonderfully, I recommend Bob's Red Mill: https://www.bobsredmill.com/
Soy Milk Powder can be found in most natural food stores and some grocery stores. If you are not dairy-free, you can replace it with milk powder. Find Soy Milk Powder Here: https://www.nowfoods.com/natural-foods/soy-milk-powder-organic
Find Knox Unflavored Gelatin at your grocery store.
If you have any questions, comments, or concerns when making pizza, send me a message: https://r7p.d98.myftpupload.com/makingpizza/
Nutrition
Serving: 1sliceCalories: 40kcalCarbohydrates: 7gProtein: 1gFat: 1gSaturated Fat: 1gPolyunsaturated Fat: 1gMonounsaturated Fat: 1gTrans Fat: 1gCholesterol: 1mgSodium: 77mgPotassium: 10mgFiber: 1gSugar: 1gVitamin C: 1mgCalcium: 3mgIron: 1mg